How to Take a Reservation in eZee FrontDesk
Introduction
There are multiple ways to make a reservation in eZee FrontDesk, but the easiest and most convenient method is through the Front Office option. Below are the steps to complete a reservation in eZee FrontDesk.
Steps to Take a Reservation
Step 1: Access the Reservation Wizard
- Click on the Navigation Button.
- Select Reservation, and the Reservation Wizard will pop up.

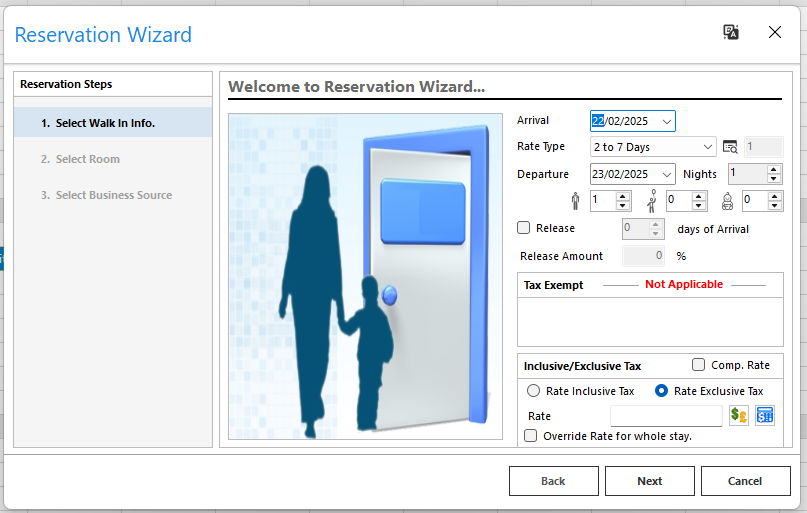
Step 2: Enter Stay Details
- Select the Arrival and Departure Date.
- Choose the Rate Type.
- Enter the number of Adults, Children, and Infants (if any).
- Configure Release Information:
- This is useful for tentative reservations, allowing the hotel to release the room if the guest fails to meet payment commitments.
- Example: If a guest agrees to pay a deposit but does not, the reservation can be released to prevent revenue loss.
- Configure Tax Exemptions if applicable.
- Enter the Room Rate to be charged per night.
Step 3: Select a Room
- Choose the desired Room Type.
- Click Next.

Step 4: Select the Business Source
- If the reservation is from a travel agent or online booking platform (e.g., Booking.com, Agoda, Expedia), select the business source.
- This helps in tracking revenue reports.

Step 5: Enter Guest Details
- Fill in the Guest’s Personal Information:
- Name, Address, Nationality.
- Contact Details (Email, Phone Number).
- If the guest has stayed before, retrieve details from the Guest Profile.
- To capture the guest’s image, use the Capture Image option (if a webcam is connected).
- To scan the guest’s ID or passport, use the Scan Image option.
- If an ID/Passport scanner is integrated, details will auto-fill in the system.

Step 6: Payment & Billing
- Choose a Payment Mode:
- Cash, Credit Card, or Bill to Company.
- If billing to a company, select the Company Name for proper invoicing.
- Add Guest Remarks (e.g., dietary restrictions, allergies).
Step 7: Finalizing the Reservation
- Review and update stay details if needed.
- If the room has shared occupants, enter details under Room Sharing.
- Under Other Information, enter arrival and departure details if required.
- If an advance payment is received:
- Go to the Payment Details tab.
- Click New, select the Settlement Mode, and Process Payment.
- Click Reserve to complete the process.
- A Reservation Number will be generated, which can be provided to the guest as a reference.

Searching and Managing Reservations
Searching by Guest Name or Reservation Number
- Use the Universal Search Button to find a reservation by guest name or reservation number.
Viewing Reservations for a Specific Date
- Click on the Navigation Button.
- Select Front Office > Reservation List.
- To search for reservations on a specific date:
- Click the Down Arrow on the top right corner.
- Select the Arrival Date and click Search.

Editing a Reservation
- Go to Stay View and select the Arrival Date.
- Locate the reservation and double-click to open it.
- Modify the necessary details and click Update.

Follow the steps on how to make a Reservation using the video below